My Progress in Astrophotography
By Randy Pitts
Editor’s note: I have been corresponding with Randy since he started doing astrophotography a few years ago. His experiences offer a good example of how one’s skills can progress over time in this challenging and rewarding hobby.
Like many people, I started in astronomy by purchasing a telescope during the pandemic. I have always had a fascination with astronomy and my daughter had recently graduated with her Ph.D. in Astrophysics, so I thought buying a telescope would be something that would get me outside instead of being isolated, and also give me and my daughter something to talk about.
My first purchase was a Celestron NexStar 8SE Schmidt Cassegrain telescope. At the time, this seemed to be about the best combination of affordability, light gathering capability and ease of use. To insure I got out and used the telescope, I joined the NorthEast Florida Astronomical Society (NEFAS.org). I have enjoyed this telescope immensely, but almost from the start I was wondering if there was a way to attach a camera to it.
Celestron manufactures the pieces needed to attach a DSLR to the back of the telescope, so I bought the adapters to fit my camera and thought to myself “I’m ready to go shoot the night sky.” I quickly learned how wrong that assumption was. While I did manage to take some photos that, at the time, I thought were amazing, I learned by muddling through many failed attempts that I simply didn’t have the proper set up.
Several issues made me re-assess my equipment with regards to imaging. The first issue was my backyard was not a place I could ever image from, which meant I had to travel to either of the two places the astronomy group uses for dark sky sessions. That meant portability had to be a priority. The second issue was the mount. I needed an equatorial style mount that was lightweight and I could attach my camera to easily. Finally, I couldn’t spend a ton of money. I wasn’t even sure this would be something I would continue to do, so if I decided it wasn’t for me, I didn’t want thousands of dollars of equipment sitting around doing nothing and trying to figure out how to sell it.
I watched a ton of videos on YouTube concerning astrophotography and lightweight setups for beginners and decided that a star tracker was the way to go. I bought the iOptron Skyguider Pro because it was lightweight, and I liked that the battery was in the unit and rechargeable instead of having to rely on separate AA batteries. The biggest bonus was the entire set up with camera and telephoto lens attached weighed about 15 pounds.
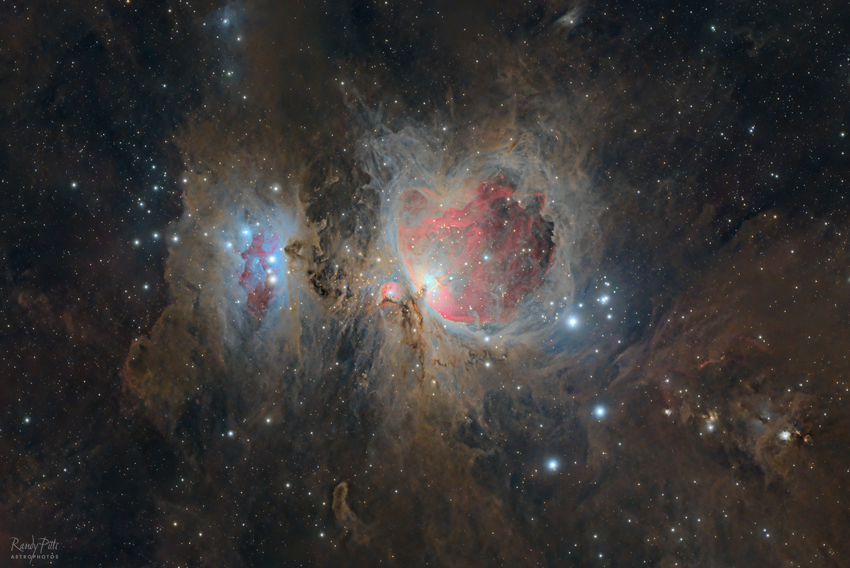
I think my first image with this setup was the Orion Nebula. The obvious reason being it was easy to find. I continued to use this configuration of star tracker, camera and telephoto lens over the next few months. This rig taught me a lot, like how to polar align and most importantly, forcing me to learn the night sky because there was no “go-to” function. Because it is difficult to find targets manually, my focus early on were easier targets like the Pleiades (M45), the North American Nebula (NGC 7000), and the Andromeda Galaxy (M31).
My first upgrade was moving from the DSLR telephoto kit lens to a small wide field refractor, I then added a guide scope and guide camera and began auto guiding using PHD2 on a laptop to run the set up. Several months later I added a dedicated astronomy camera and the ASI Air plus to run everything from my iPad.
I used this setup for almost a year and have recently added the AM 5 mount to replace the star tracker. This mount is quite good and it’s such a time saver being able to slew to targets at a touch of a button, and having the meridian flip done automatically. I also like that the auto guiding is much more precise meaning I’m not limited to 2 minutes tops like I was with the star tracker. The huge time savings comes from the mount’s go-to capability and everything is automated. Even with the ASI Air plate solving function, aligning on, and framing the target took time when using the star tracker, sometimes as long as 30 minutes to get the target composed the way I wanted. Then having to manually re-frame after the meridian flip often meant another 30 minutes. That’s almost an hour of potential data collection wasted. The AM 5 has eliminated those wasteful manual steps.